

For people like me — an absolute noob, with a little help from Docker
Before we get into all the “technical” stuff, a little bit about myself: I’m a tech startup person with a finance / marketing background, I’ve been bullish on DeFi since early 2019, and I’m a proud yield farmer. So, you can tell that I’m NOT tech-savvy and I know ZERO coding stuff.
But why on the earth do I still want to go through all the troubles to set up and run a miner on Stacks 2.0 testnet? Because of my curiosity — what happens if we bring DeFi to the Bitcoin ecosystem? And I believe Stacks 2.0 will be the next DeFi powerhouse, and most importantly, the whole process of setting up a node on Stacks testnet and running a miner, turned out not to be very complicated as I thought.
If you’re naturally curious and not very tech-savvy, but you want to join the DeFi on Bitcoin movement before everyone else does, and earn STX rewards by joining the STX mining challenge, please keep reading 🙂
At the end of this guide you will be able to:
– Run your testnode on the Stacks 2.0 blockchain Krypton testnet
– Set up and run a miner on the Stacks 2.0
My Computer Setup
MacBook Air with macOS Big Sur, really basic one, nothing fancy.
Running a Testnode
Step 1: Download and Install Docker
Go to Docker and install Docker on your Mac. It’s free, if you have a privacy setting as I do, make sure to manually change Docker as a trusted software so it can run on your Mac.
Step 2: Open Terminal
Open the /Applications/Utilities folder on your Mac, type in a search to find the Terminal then double-click it.
1. Type the command as below — copy all the commands at once and paste them in the Terminal, then press Enter:
docker run -d \
–name stacks_follower \
–rm \
-e RUST_BACKTRACE=”full” \
-e BLOCKSTACK_DEBUG=”1″ \
-p 20443:20443 \
-p 20444:20444 \
blockstack/stacks-blockchain:latest \
/bin/stacks-node krypton
In your Terminal, you will see this:

The installations will process automatically, and once complete you will see a blank command shows up.
2. Review the node logs by typing the following command:
docker logs -f stacks_follower
You can see this in your Docker:

Looks like the node connects to the Stacks 2.0 Krypton testnet now.
Mining Stacks Token on the Testnet
Step 1: Generate keychain
1. Get the keychain and BTC address:
Type the command as below in your Terminal:
docker run -i node:14-alpine npx @stacks/cli make_keychain -t 2>/dev/null
Then wait for the keyInfo shows up like this screenshot:
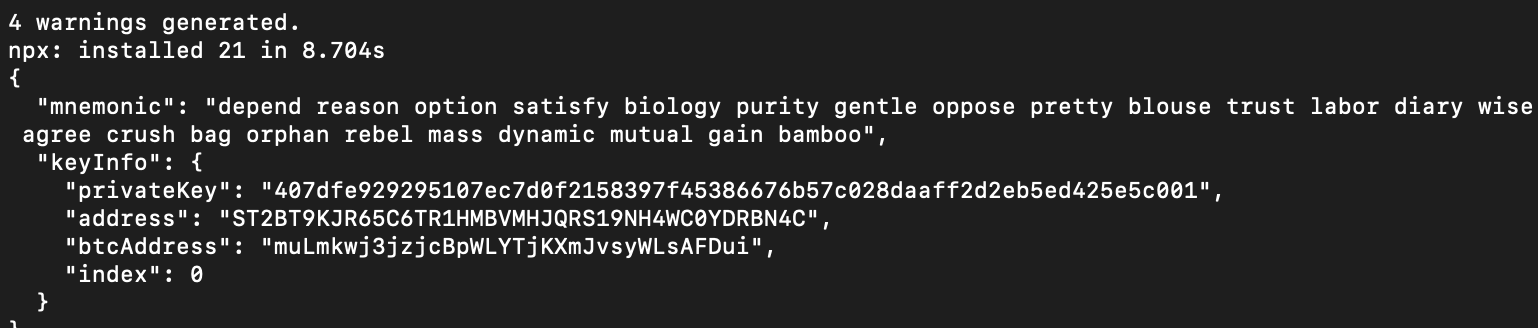
You can see I’ve got the private key, STX address (“address”), and BTC Address. (Please ignore the “warning” on the top of my screenshot).
2. Let’s get some testnet BTC
Open a new tab and head over to Bitcoin Testnet, copy your BTC address that you just got and paste it in the Bitcoin testnet faucet like this:
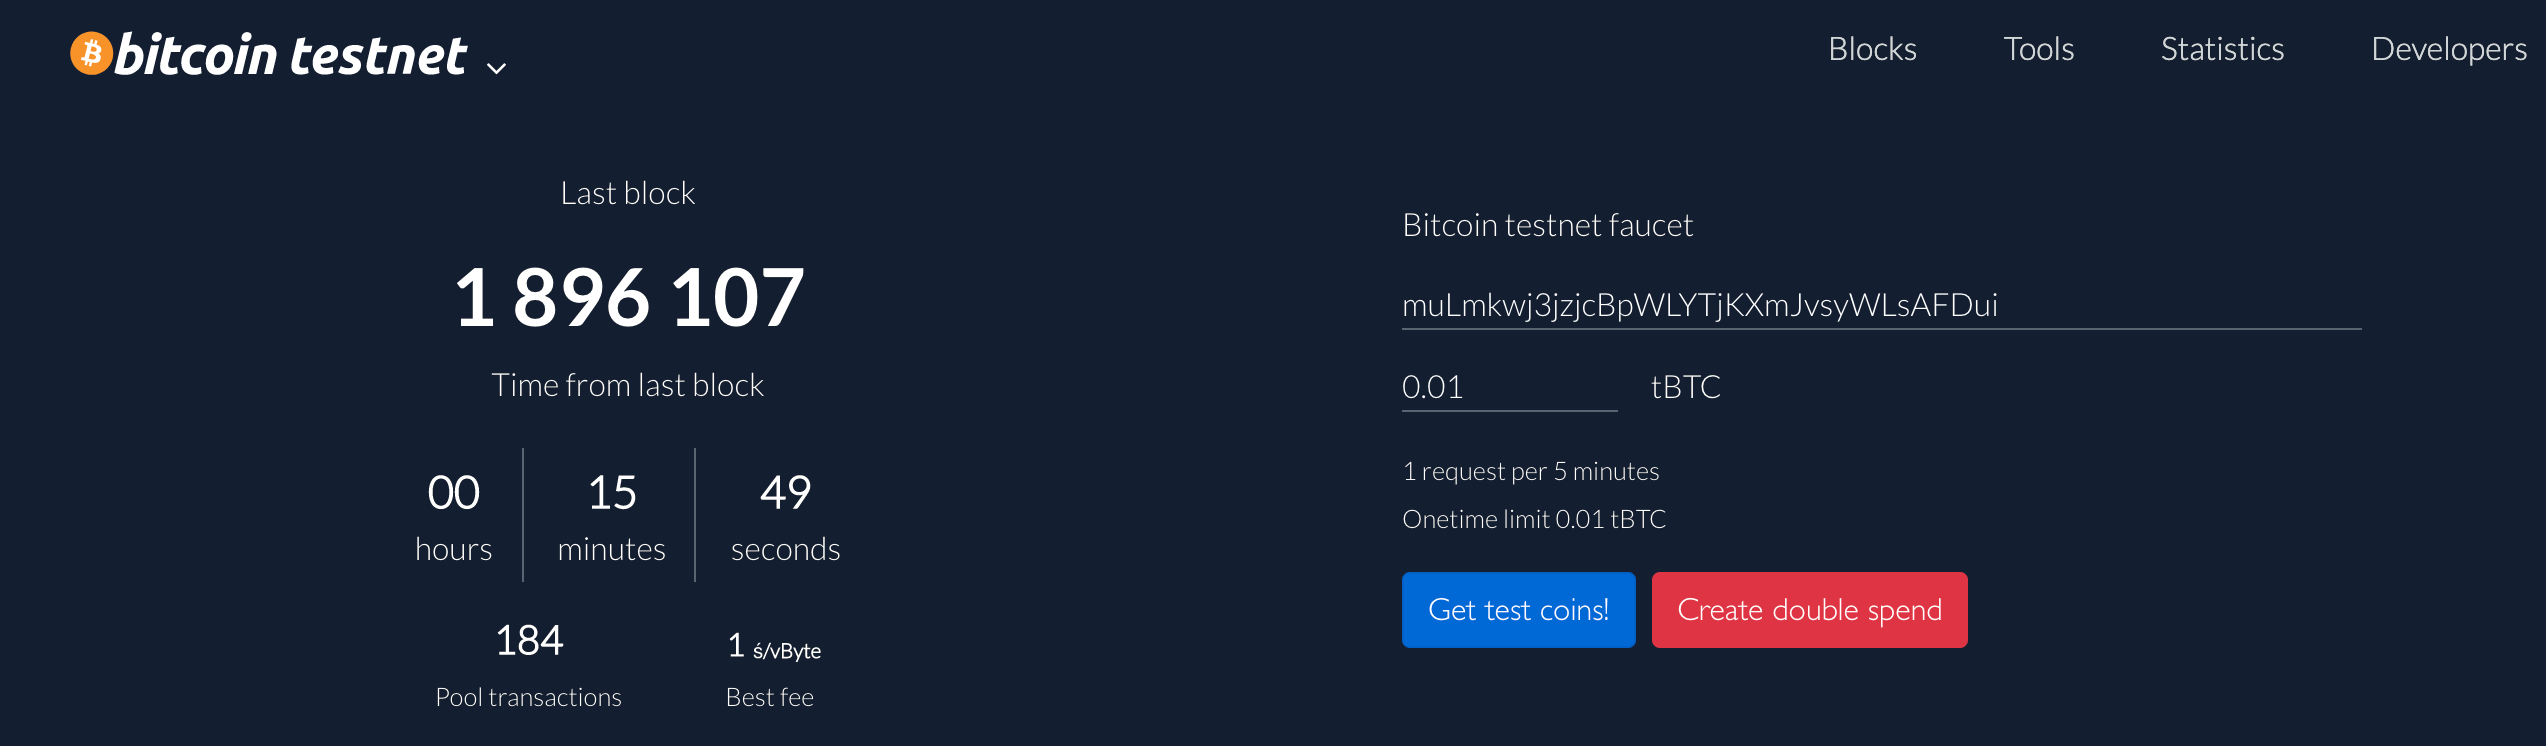
You will receive 0.01 testnet BTC after you choosing “Get test coins!” — you probably will wait for 5 more minutes, just be patient, you will get the tokens and you’re almost done!
3. Make sure you have a dedicated directory to keep the config files
Type the command in your Terminal as below:
mkdir -p $HOME/stacks
After pressing the Enter, nothing showed up on my end, I think it means all set (I think :).
Step 2: Create a config file directory
Create a new miner config by copying commands as below and pasting them in your Terminal:
[node]
working_dir = “/root/stacks-node/current”
rpc_bind = “0.0.0.0:20443”
p2p_bind = “0.0.0.0:20444”
Enter your private key here!
seed = “replace-with-your-privateKey-from-generate-keychain-step”
miner = true
[burnchain]
chain = “bitcoin”
mode = “krypton”
peer_host = “bitcoind.krypton.blockstack.org”
process_exit_at_block_height = 5340
burnchain_op_tx_fee = 5500
commit_anchor_block_within = 10000
rpc_port = 18443
peer_port = 18444
[[mstx_balance]]
address = “STB44HYPYAT2BB2QE513NSP81HTMYWBJP02HPGK6”
amount = 10000000000000000
[[mstx_balance]]
address = “ST11NJTTKGVT6D1HY4NJRVQWMQM7TVAR091EJ8P2Y”
amount = 10000000000000000
[[mstx_balance]]
address = “ST1HB1T8WRNBYB0Y3T7WXZS38NKKPTBR3EG9EPJKR”
amount = 10000000000000000
[[mstx_balance]]
address = “STRYYQQ9M8KAF4NS7WNZQYY59X93XEKR31JP64CP”
amount = 10000000000000000
Step 3: Run the miner
In your Terminal, type commands:
docker run -d \
–name stacks_miner \
–rm \
-e RUST_BACKTRACE=”full” \
-e BLOCKSTACK_DEBUG=”1″ \
-v “$HOME/stacks/Config.toml:/src/stacks-node/Config.toml” \
-p 20443:20443 \
-p 20444:20444 \
blockstack/stacks-blockchain:latest \
/bin/stacks-node start –config /src/stacks-node/Config.toml
And press Enter.
You will see this “crazy stuff” popping up but don’t panic, it means things are up and running!

Anyway, that’s all I did. I followed the original guide here — if you go to the guide page right now, you will see that Blockstack has launched Xenon — the final phase of the Stacks testnet. So I highly recommend you to check out the latest guide and go follow along.
Also, Blockstack does recommend a few different ways via Rust and Virtual Machine (Oracle VirtualBox) to help you run a miner on Stacks 2.0 other than Docker. And you can download the pre-made binaries (node) here. Unfortunately, only Docker works on my end. I will ask the community to help me look into it and hopefully, I can set up STX mining before Stacks 2.0 mainnet goes live. If you made it to the end on Rust or VM, please share your tutorial with me!
